


Flow Cytometry Failures & Fixes [Complete List]
This might be Wildtype One's longest article so far, because of the many ways flow cytometry experiments can go wrong.
Unlike Western blot failures, once the cause is identified in flow cytometry, your experiment can be rescued with one straightforward fix.
Most issues fall into six categories:
I. Sample preparation
II. Staining and panel design
III. Instrument
IV. Compensation
V. Data analysis and gating
VI. Rare events
Below is a bullet-pointed troubleshooting list with common failure types and steps to fix them.
🧫 Join our network of 400+ elite researchers by signing up for Wildtype One’s FREE newsletter.
I. Sample Preparation & Cell Quality Issues
Failure #1 - Low cell recovery/event rate
Why it happened
If you loaded plenty of cells but see very few events during acquisition, cells might be getting lost during prep. For example, it’s easy to accidentally discard cell pellets along with supernatant during washes (especially in plate-based preps).
What to do
Use gentle centrifugation and carefully aspirate supernatant without disturbing the pellet
Leave a small volume rather than risk sucking up cells
Check cell counts after each wash step to pinpoint any loss
If using 96-well plates, switch to tubes or use plate centrifuges designed to minimize pellet disturbance
Failure #2 - Cell clumping & clogging
Why it happened
Clumped cells or debris clog cytometers and yield erratic event rates (slow acquisition or sudden drops). Clumps appear as large events with high FSC/SSC.
What to do
Pass samples through a cell strainer or nylon mesh before running
Include DNase in buffers for tissue or older samples—free DNA from dead cells can cause clumping
Resuspend cells at optimal density (typically 105–107 cells/mL)
Avoid high-speed spins or rough pipetting
If clogging occurs, follow instrument unclogging protocols; ensure sheath fluid and filters are clean
Failure #3 - High dead cell fraction
Why it happened
Poor viability increases autofluorescence and background noise.
What to do
Use fresh samples and gentle handling
Always use viability dyes to exclude dead cells
Analyze fixed cells promptly or store briefly, as prolonged fixation increases autofluorescence.
For adherent cells, use gentle detachment (Accutase) and allow 30 min recovery at 37 °C post-trypsinization to avoid false positives (e.g., Annexin V)
Failure #4 - Sample autofluorescence
Why it happened
Some cell types (tissue digests, macrophages) or aged samples exhibit high autofluorescence.
What to do
Use unstained controls to gauge autofluorescence
Design panels avoiding problematic fluorochromes (e.g., FITC, PE)
Try quenching protocols or gate out autofluorescent events
Maintain fresh cells with proper storage (4 °C, dark, specialized media)
II. Antibody Staining & Panel Design Issues
Failure #5 - No signal or weak fluorescence
Why it happened
Titrate antibodies and verify specificity with positive controls
Use minimal fixation (e.g., 2% paraformaldehyde, 10–15 min)
Confirm compatibility of fixation/permeabilization methods
Pair rare antigens with bright dyes (PE, APC); abundant markers with dimmer dyes
Protect antibodies from light; use fresh conjugates
Failure #6 - High background / non-specific staining
Why it happened
Include Fc block or serum/BSA blocking step
Titrate antibodies to minimize background
Add extra washes; use gentle detergents (e.g., 0.1% Tween-20)
Use viability dyes; perform FMO controls for gating accuracy
Failure #7 - Fluorochrome spillover & panel flaws
Why it happened
Choose fluorochromes with minimal overlap
Pair critical markers carefully (e.g., FITC vs PE)
Run single-color controls
Prioritize fewer, better-resolved parameters or consider spectral cytometry
III. Instrument Setup & Acquisition Issues
Failure #8 - Incorrect PMT voltage/gain settings
Why it happened
Too low: PMT voltage too low, causing signals to bunch near zero and losing sensitivity
Too high: PMT voltage too high, pushing even negative populations to high values or compressing populations at the upper end
Misaligned laser or incorrect filters causing weak signals or abnormal scatter
Instrument background or electronic noise creating spurious events
What to do
Run a voltage titration using positive controls to find optimal PMT settings
Use unstained and single-stain controls to properly scale negative and positive populations
Perform routine alignment checks using beads and ensure laser/filter configurations match your panel
Regularly flush and clean fluidics lines; maintain fresh, degassed sheath fluid
Failure #9 - High event rate or abort rate
Why it happened
Use a lower flow rate (ideally <200–300 events/sec) for tighter data and reduced aborts
If higher flow rates are necessary, dilute your samples or acknowledge potential loss in sensitivity
Failure #10 - Clogs and pressure issues
Why it happened
Partial clogs cause sudden event rate drops or intermittent surges
Common causes: dried sheath filters, improperly seated tubes, or dirty nozzles
What to do
Pause acquisition immediately, backflush tubes, and follow standard unclogging procedures
Regularly inspect and clean sheath filters, sample tubing, and nozzles
Maintain consistent daily and weekly instrument cleaning schedules
Failure #11 - Inconsistent results across runs
Why it happened
Instrument drift
Laser power variations
Differences in PMT calibration
What to do
Include reference controls (e.g., rainbow beads or stable cell lines) to monitor instrument performance
Maintain consistent PMT voltages and gain settings between runs
Cross-calibrate multiple instruments if used for parallel experiments
🧫 Join our network of 400+ elite researchers by signing up for Wildtype One’s FREE newsletter.
IV. Compensation & Fluorescence Spillover Issues
Failure #12 - Incorrect compensation
Why it happened
Missing single-color controls (e.g., viability dye or tandem dye controls)
Compensation beads not perfectly matching cell staining patterns
Overcompensation causing negative populations to appear below zero
Unexpected double-positive populations due to biology or staining artifacts
What to do
Always run fresh single-color controls (including viability and tandem dyes)
Use actual cells rather than beads if beads do not match staining adequately
Adjust compensation matrices systematically and verify by inspecting 2D plots (each control should be positive in only one channel)
Use bi-exponential scaling plots to identify overcompensation (symmetrical spread around zero)
Employ Fluorescence Minus One (FMO) controls to objectively set gates and clarify unusual populations
Failure #13 - Fluorescence spillover spreading
Why it happened
Physical limitations of photon counting and electronics cause spreading from bright signals into adjacent channels, masking dim signals
What to do
Optimize panel design to minimize using bright fluorophores adjacent to channels measuring dim signals
Refer to Spillover Spread Matrix (SSM) data published by instrument manufacturers for optimal fluorophore selection
Increase event collection for better statistical confidence
Rely on FMO controls for setting precise gates in high-spread scenarios
V. Data Analysis & Gating Issues
Failure #14 - Gating out debris and dead cells
Why it happened
Set a tight, conservative gate on FSC vs SSC to capture intact cells clearly
Always use a viability dye to exclude dead cells (they overlap with debris on scatter plots)
Confirm gate accuracy by back-gating
Failure #15 - Doublet discrimination
Why it happened
Cell doublets skew data, especially in cell cycle assays (two G1 cells mimic one G2)
Doublets inflate counts for rare populations by counting two cells as one event
What to do
Use pulse geometry gates (FSC-A vs FSC-H or SSC-A vs SSC-H)
Single cells fall along the diagonal line; doublets deviate significantly
Tight gating on singlets is critical, especially for DNA-based assays
If you notice missing populations (e.g., no G2 peak), double-check your doublet gates
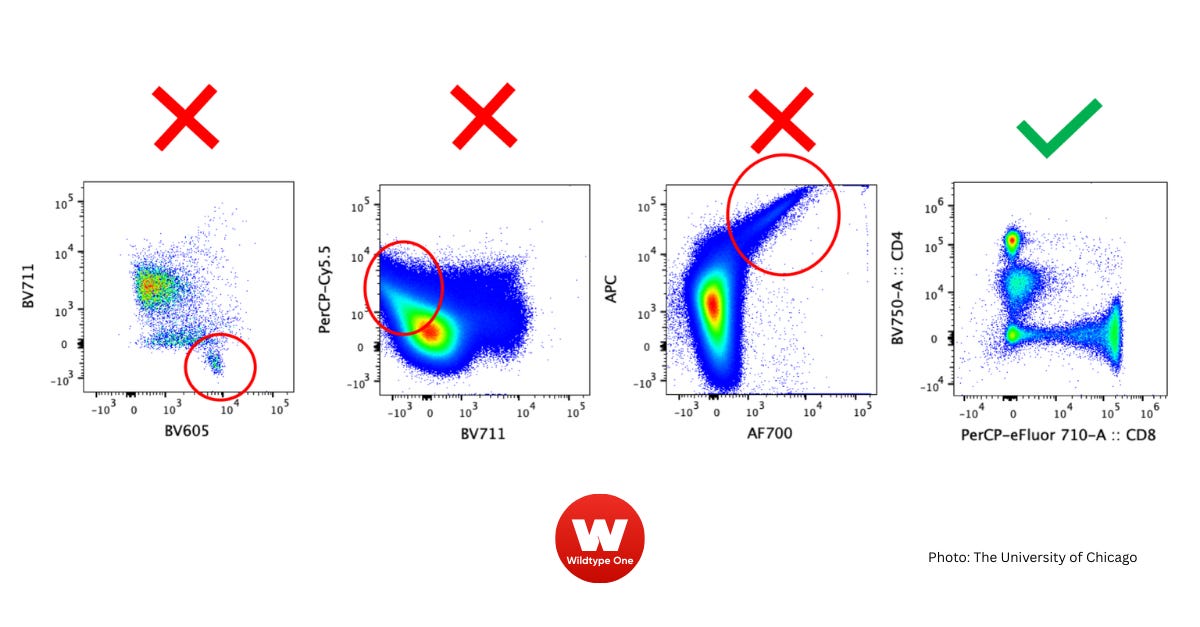
Failure #16 - Inconsistent gating thresholds
Why it happened
Standardize gating with Fluorescence Minus One (FMO) controls. FMOs define clear negative populations objectively
Always include known positive and negative controls for clear reference
For continuous markers, pick a consistent threshold (e.g., top 10% of cells) or use software to measure median fluorescence intensity instead of just percent-positive
Failure #17 - High background in untreated controls
Why it happened
Instrument settings too sensitive
True biology causing unexpected positivity (e.g., Annexin V positivity)
What to do
Adjust PMT voltages and compensation so untreated controls have <5% positive cells
Verify gating doesn't include autofluorescent or dim cells as positive by comparing against an unstained control
Annexin V assays: include calcium in binding buffer and handle cells gently to avoid artificial phosphatidylserine exposure
Always run positive controls (e.g., cells treated with apoptosis inducers like staurosporine) to confirm assay sensitivity
Failure #18 - Batch effects & reproducibility issues
Why it happened
Whenever possible, analyze comparative samples in one run
Use fluorescent reference beads or stable cell lines as internal standards to track instrument variability
Always apply consistent voltage/gain settings
Clearly document gates using absolute values or references to control peaks to maintain consistency between experiments
VI. Rare Population Detection & Sensitivity
Failure #19 - Trouble detecting rare events
Why it happened
To detect a 0.1% population reliably, acquire at least 500,000–1,000,000 total events
Concentrate samples to collect more events if possible
Consider enrichment methods (e.g., magnetic beads) to increase frequency of rare populations
Be aware enrichment might introduce biases or loss—include proper controls
Failure #20 - Low statistical confidence
Why it happened
Aim for at least 100 events per gate to maintain statistical reliability
If unable to collect enough cells, report cautiously or combine replicate data if scientifically justified
Use a statistical threshold (e.g., minimum 50–100 events) before confidently calling a rare subset positive
Cross-validate using alternative methods (PCR, microscopy) to confirm rare events
Failure #21 - False positives in rare event gating
Why it happened
Tighten gating and use multiple marker criteria sequentially to exclude false positives
Check the "Time" parameter vs scatter to identify clogs or bursts of anomalies
Drop anomalous time periods during analysis to clean data
Validate rare event data by orthogonal methods when possible
Failure #22 - Poor resolution of rare markers
Why it happened
Rare positive cells might have only slight fluorescence shifts, blending into negatives
What to do
Assign the brightest fluorochrome available to rare/dim markers
Set cytometer to maximum sensitivity for these channels
Use bi-exponential scaling to visualize slight shifts clearly
Consider longer staining incubation or higher temperature to boost signals (without significantly raising background)
Quantify using median or mean fluorescence intensity rather than rigid gating when resolution is low
In summary,
Successful flow cytometry in research is a balancing act of good sample handling, smart panel design, careful instrument setup, and rigorous controls during analysis.